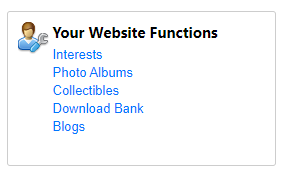
When the Collectibles and Member Directory modules are both enabled, a new link appears in the section Your Website Functions in the Member Profile.
Clicking this link displays a screen similar to the following:

This is a similar screen to the main user side of the module, without the Search panel.
Filter the list by Status. The following status values are available:
- Draft is an item in process; it’s not yet ready to be shown to others.
- Active is a complete item that will be shown to others in the main Collectibles list.
- Rejected is available to admins only if an item is not suitable or needs corrections. The member will need to edit it and contact the admin to make it active again. Members cannot change the status of a rejected item but they can change everything else.
- Archived is for an item that you no longer wish to show, perhaps because it’s been sold or otherwise removed from your collection.
Click the Search button to display matching results. Each item is shown with its reference number (which can be relabeled), it’s formal “name”, when it was acquired, and its status.
Click the Display Sequence button to control the order in which items are displayed.
Click the Add <Item> button to add a collectible item. The "item will be unique to your club.
The status colors are as follows:
- Green = Active = green
- Yellow = Draft or Archived
- Red = Rejected
Click the Edit Information link to edit standard properties for the item.
Click the Copy link to make a complete copy of the item. You might use this option if you own multiple items that are similar, or an item has been restored (such as a vintage car) and you want to list properties both before and after the restoration.
Click the Delete link to delete an item, including all of its properties. You will be prompted to confirm this action.
- Specify the item name.
- Specify the item ID (such as a VIN for a vehicle).
- Specify either the full date or just the year the item was purchased and/or sold.
- Click the Save button to save your changes or the Cancel button to exit without saving.
Select One Photo, and click the Upload Photo button to upload a photo. Click the Remove link to remove a photo. Note that if you disconnect a photo from your item, the photo still remains in your collection of photos. Select Use Photo Album and select a photo album from your member profile. Click the Save button to save your changes or the Cancel button to exit without saving.