To register for an event, click the Register Now button. (Note that it may be called something different, such as Sign Up.) If the event is configured to handle registrations using a different website, a new window will open showing the configured site and page.
If you have already registered for this event, a warning message will be displayed, but the system will not stop you from registering again unless duplicate registrations are explicitly blocked.
The Registration wizard may have up to seven different screens, depending on how the event is configured and which options are enabled:
The first section of this page varies according to the following rules:
If the event is open to non-members and the current user is not logged in, the following screen will be displayed.
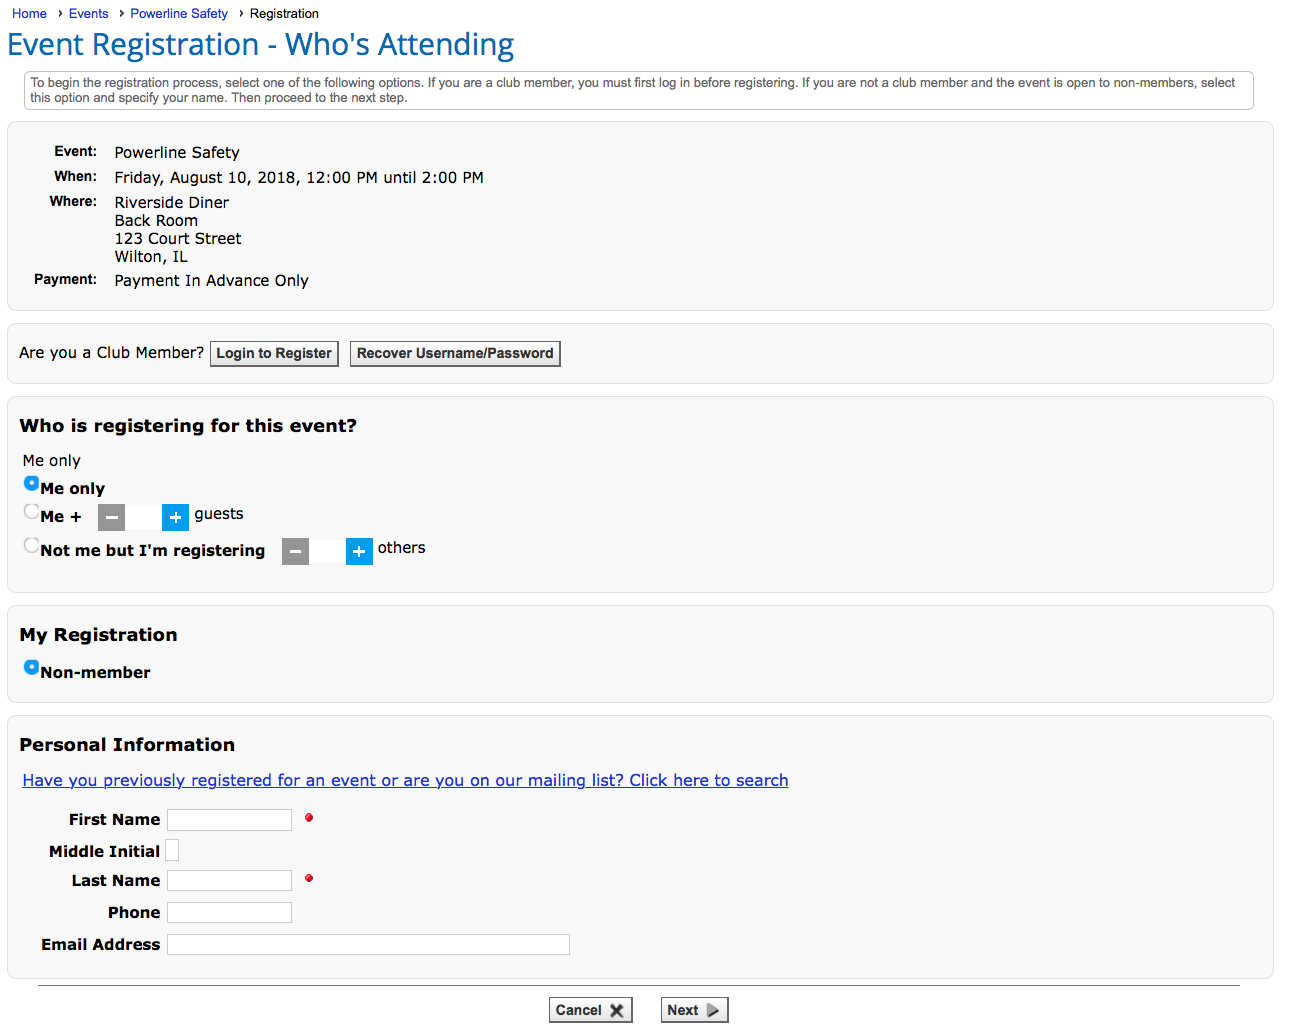
The event details are listed at the top so that users can see which event they are registering for.
Members are invited to login and can click a button to recover their credentials.
Who is registering -The options are:
- The current user only
- The current user plus 1 or more guests
- Not the current user but he or she is registering others
If the event configuration does not allow guests, then the 2nd and 3rd options are not shown.
Current user’s Registrant Type - The system will only show registration types that are appropriate. In the above example, there is one Registrant Type for a non-member so that’s the only option. And if the “Not Me but I’m registering X others” radio button is selected, then this panel will not be displayed because there’s no reason to collect a Registrant Type for someone who’s not registering.
Because this is a non-member registration, the system next prompts for the user’s contact information. Non-members are asked if they have previously registered for an event. Some information may be required depending on the event configuration.
Select the Click here to search to display the following panel:
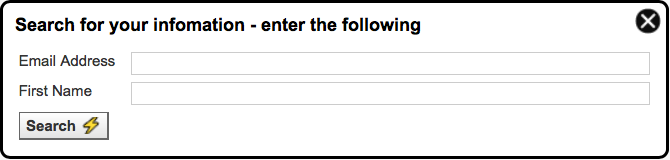
Enter an email address and first name then select the Search button. If a match is found, the contact fields are refreshed with the information from the database. Users can update this information and it will be saved. The event registration will be attached to the existing non-member record instead of a new one.
If the current user is a logged-in member, he or she will see the following screen:
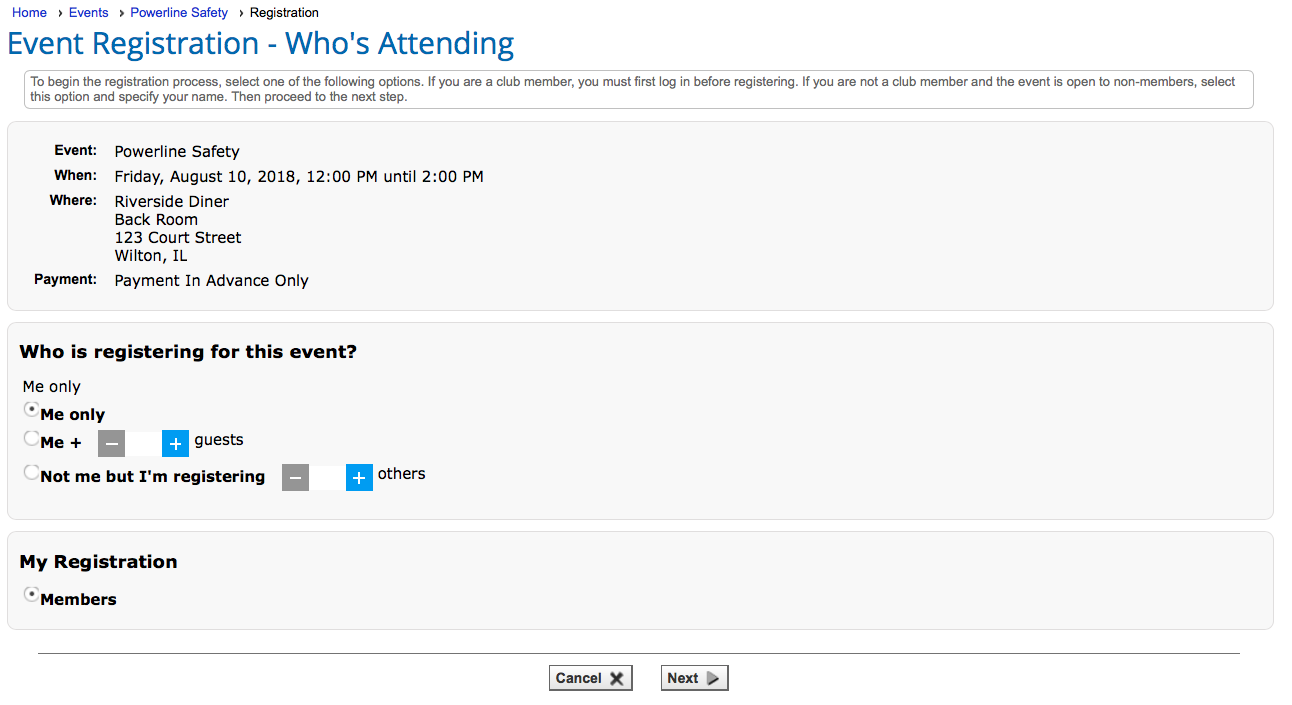
The system already knows who the member is. All he or she has to do is specify who is coming and select a registrant type. Multiple registrant types may be listed. And if the member chooses to bring guests or is signing up other people, the Registrant Type selection moves to the next screen.
If the current user is a club administrator or module coordinator, or a coordinator of this specific event, he or she will see the following screen:
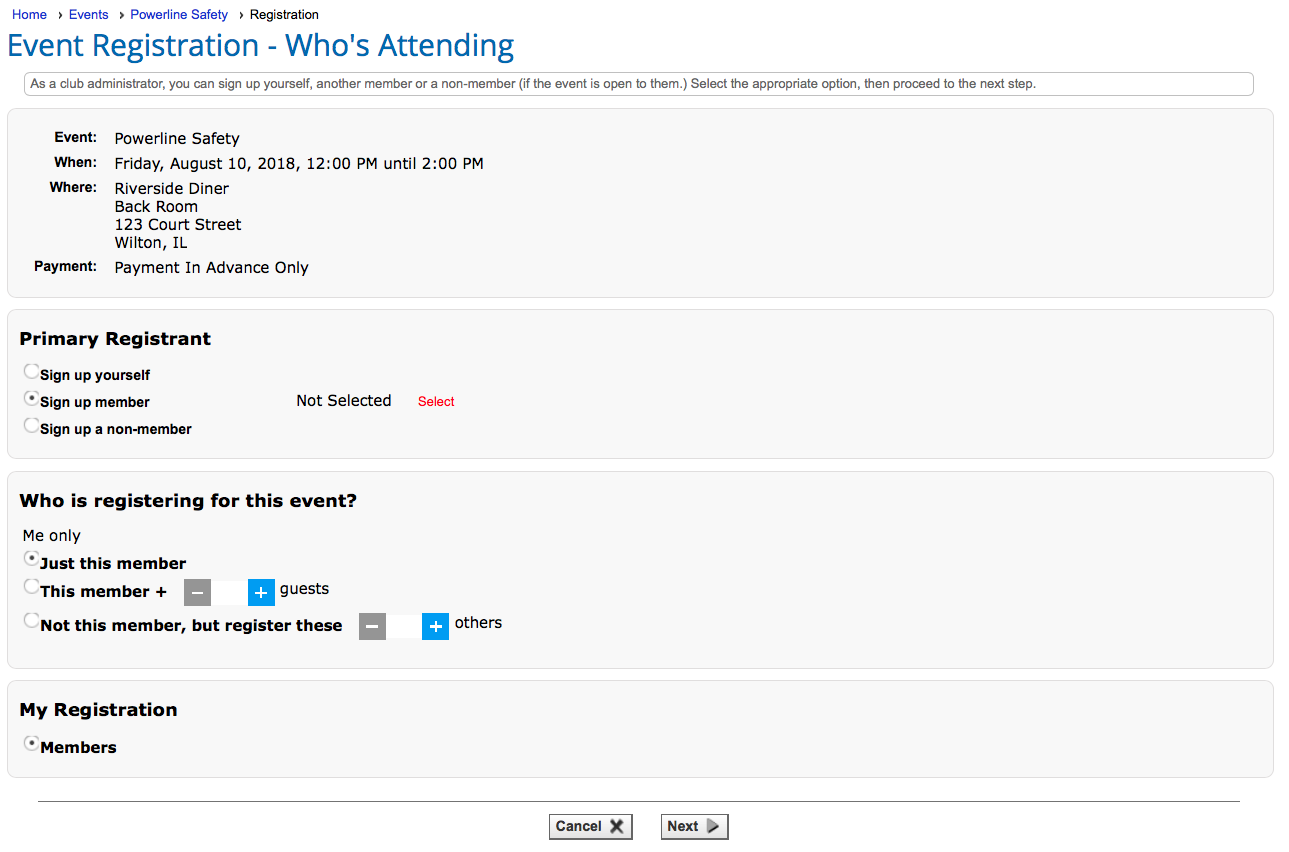
Three radio buttons allow admins to register themselves, another member, or a non-member using the name and address panel. Administrators can register active and pending members only.
The admin must also specify a registrant type. This list will be dynamic based on the registrant types defined for the event and on whether the registrant is a member or not.
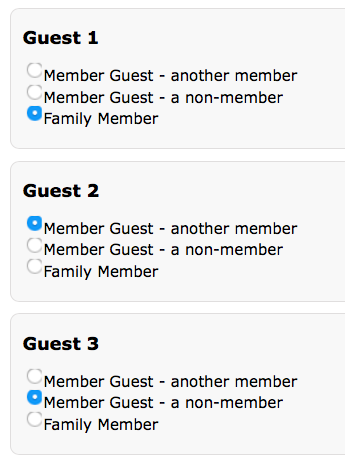
If the event allows guests to be signed up and the user has specified the number of guests to be added, the next wizard screen allows you to specify a registrant type for yourself as well as for each guest up to the total number specified.
For member guests, there are three possible registrant types:
- Someone in your membership, such as a family member
- Another member
- A non-member
Note: When searching for other members to add to a registration, you will see Pending members included in the member selector list (a Pending status indicates the individual has not yet paid their membership dues). To register these members, you will need to also pay their membership dues.
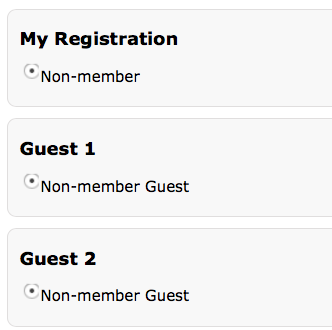
For non-member guests, there are two possible registrant types:
- Another non-member
- A non-member in a specific mailing list category (e.g. “Press”)
There are also special registrant types that may be used:
- Everyone (usually used on its own, when everyone pays the same fee)
- Members based on their member type
- Members of a specified committee
- Members of a specified subgroup (chapter, district, or region)
What appears on the screen will depend on what registrant types have been configured for this event. And some options may appear more than once, with different fees.
Example:
Event registrants will only see registrant types that apply to them, based on their membership status, type, level, committee membership, non-member category, etc. They can then pick the best price available to them.
Example: The following event registration is for a member and three guests:
And this registration is for a non-member with two guests:
In many cases, only one registrant type will be available and it will be automatically selected.
In the member example above, the selection determines what will appear on the next screen:
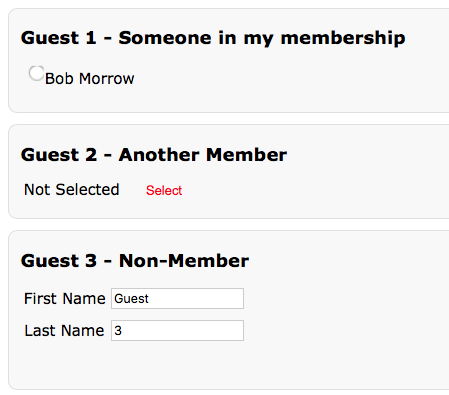
- Selecting “Family Member” (or whatever it’s called for that event) displays a list of people in your membership to pick one. In this case, there is only one secondary member.
- Selecting “Member Guest – another member” (or whatever it’s called for that event) allows you to search for a member by clicking the Select link to add him or her to your registration.
- Selecting “Member Guest – a non-member” (again, the name could change) allows you to enter the contact information for that person. In the above example, the event has been configured to only collect first name and last name, but you could prompt for more information including:
- Company and title
- Address
- Email address
- Phone
- Mobile Phone
Note: If text messaging is enabled for the club or association and you would like to receive text messages regarding event updates, you must opt-in to receive text messages.
Administrators: You can control which information is required or optional. Non-member guests will be added to the non-member database using the mailing list category that you have specified for this event. The default category is “Event Registrant”.
Click Next to proceed to the next screen in the wizard. The next screen you see will depend on whether the event as defined has just a single activity or multiple activities, whether there are event-specific questions and whether a release agreement must also be signed. For a single activity event, the following screen is skipped.
After the initial registrant information page, for a multi-activity event, users are taken to a page similar to the following, which lists the individual activities for the event and allows separate registration for each activity.
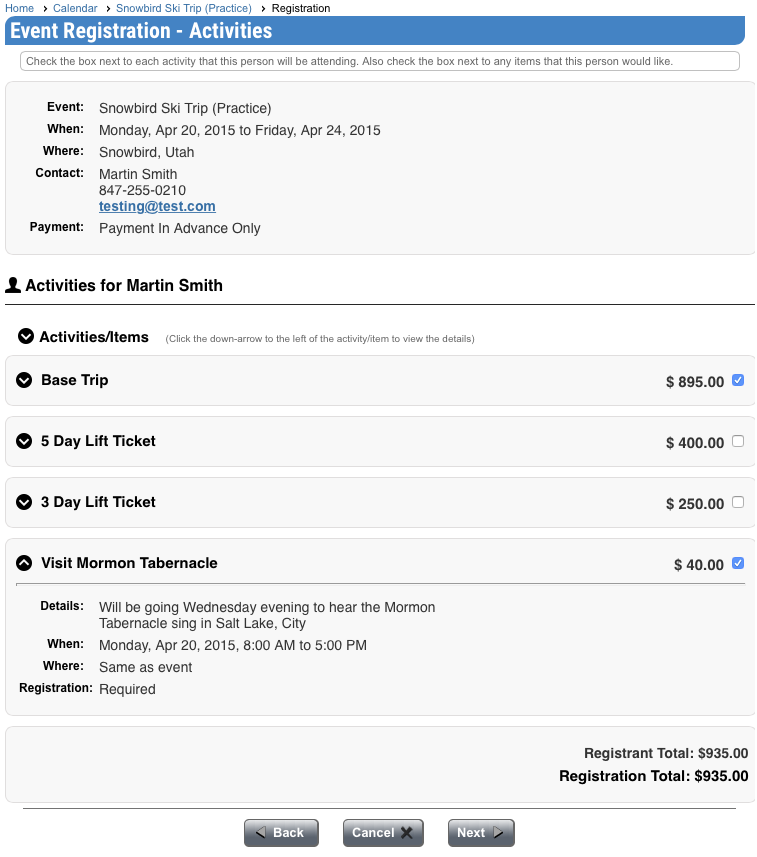
This wizard screen will be displayed once for each person who is part of the registration, first the primary registrant and then each of his or her guests in turn. Only activities that each individual user or guest can sign up for will be shown on each iteration of the wizard page. Registration is a simple matter of checking the box to indicate that the current person will attend that activity or purchase that item. If an activity fills up while someone is registering, it will not be shown on subsequent iterations of this screen. Users can move forward or backward through the wizard to ensure that the most appropriate people in the party are signed up for each activity.
If the multi-activity event includes items, such as a conference t-shirt, you can specify the quantity of each item that you want to purchase.
The event activities page keeps a running total of registered activities and fees. When users finish registering for individual activities, they click the Next button to proceed to the next page. If event-specific questions are defined, this screen will be displayed next. If a release agreement is required, this page is displayed next. If neither is required, the summary page is immediately displayed.
If the event has event-specific questions, a page similar to the following is shown:
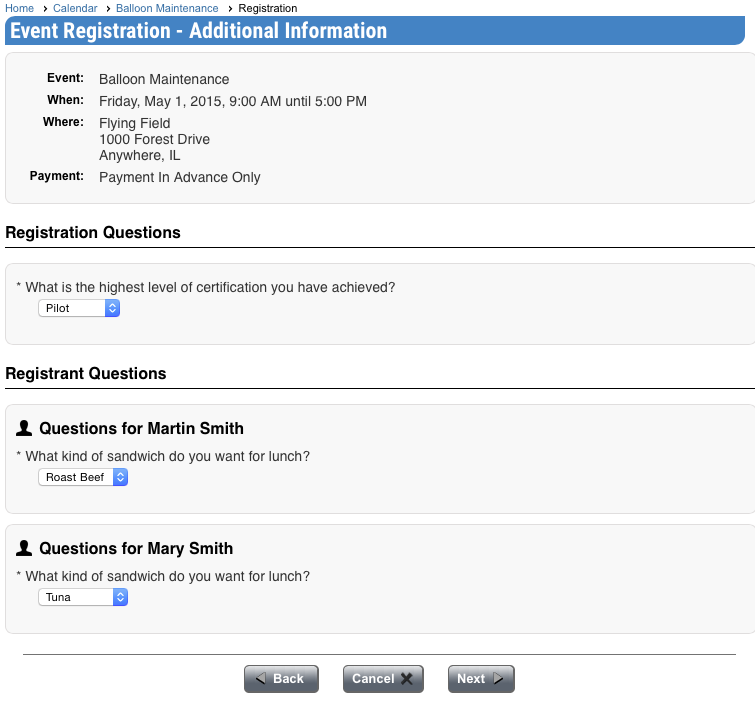
Questions can be defined at any of three levels:
- For the registration as a whole;
- For each registrant including guests added to the registration;
- For each registrant signed up for a specific activity (this option is only shown for multi-activity events.)
Answers may be required in different formats, including text, number, date or date part, Yes/No or a selection list. Some answers may be required while others are optional. When you have answered the questions, click Next to proceed to the next screen.
If a release agreement is defined, this page is displayed next. Click the “I agree on behalf of myself and everyone included in this registration” checkbox to signify acceptance of the agreement and then click the Next button to display the summary page above.
If the event has both questions and a release agreement, the questions page will be displayed first, then the release agreement page.
Note that the system will store the date and time when the release agreement was signed.
The Summary page is the last page in the event registration wizard. For a single activity event with no guests, no event-specific questions, and no release agreement, the wizard only has two screens.
If guests were added to the registration, these will also be listed. The system will show who is signed up for each activity and any event fees, based on the registrant and guest types already specified. If there is no fee, the summary page will confirm this fact.
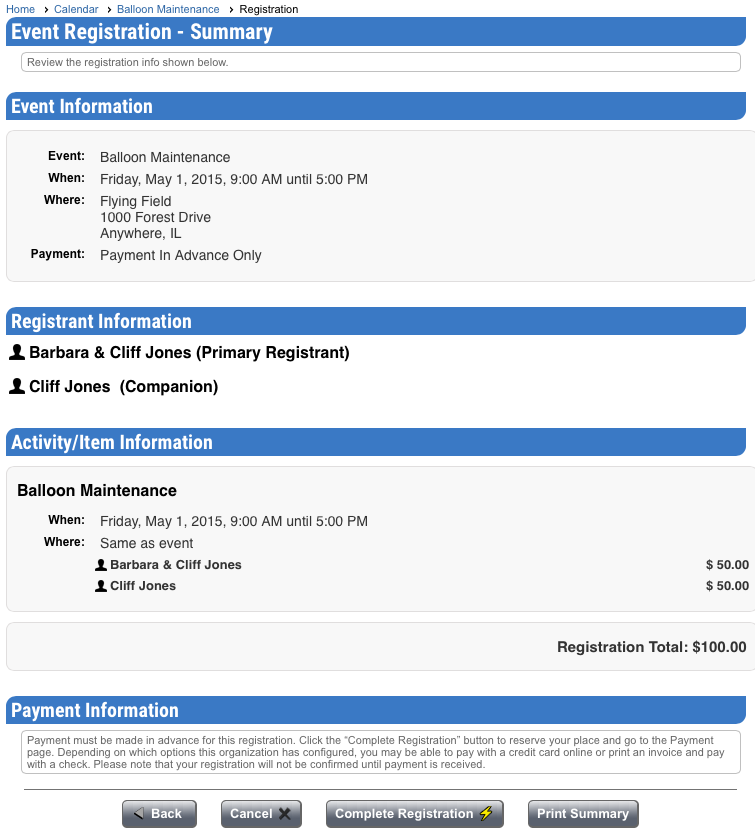
At this point, users can still click the Back button to return to a previous step, or the Cancel button to cancel the registration process.
The system knows if payment is required in advance, or if payment must be made at the event, or if either option is allowed. In the above example, clicking Complete Registration will take users to the payment module to complete payment. Users will receive a confirmation email for the registration and another when the fee is paid. A registration is not saved until one of these buttons has been clicked.
For events with a fee, clicking the Complete Registration button displays a screen similar to the following.
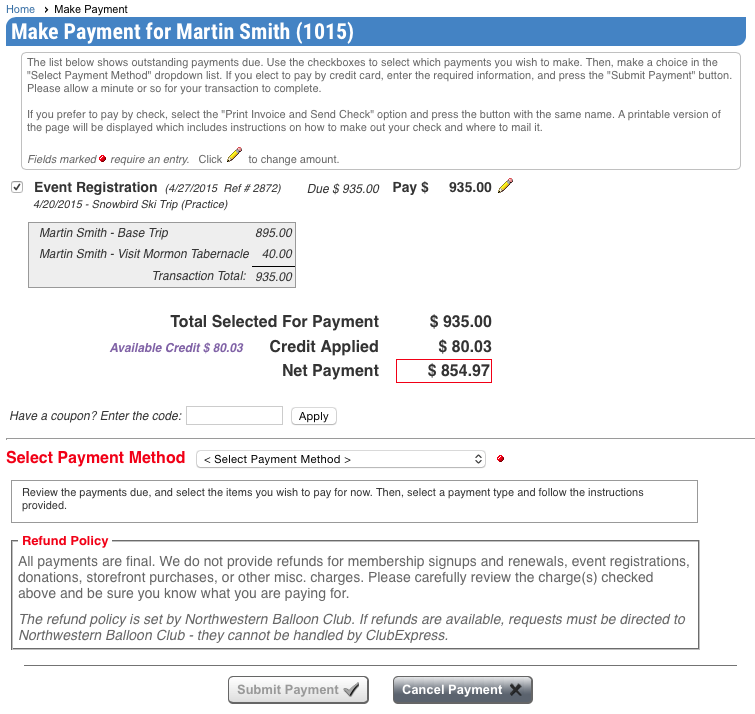
This screen will show the final payment for the event, including the details of each line item (registrant, companion(s) and activities. If you have other pending transactions, such as a membership renewal or registration for another event, these will also be listed and you can pay for them all with one payment.
Select the payment type and enter any additional information that’s required. For a credit card payment, this is your credit card information. For a check payment, a print function is available to generate an invoice for mailing with the check. Administrators have access to additional payment options (credit card outside ClubExpress, cash, complimentary, etc.)
The system maintains a Payment Status flag for event registrations. If you choose to pay by check, your registration is stored in the database but it’s not confirmed until the check is received (and may be deleted by an event coordinator if there is a capacity limit and others are willing to pay immediately.)
Note: When non-members register for events and pay by credit card, an additional “Technology Convenience Fee” may be added to the transaction. This fee is charged by ClubExpress, not your club or association, and is retained by us.
Some events may be configured to allow partial payments.
Example: A ski club may organize a multi-day trip to a distant ski resort, and members will have the option of making progress payments until the total has been paid.
If you see a pencil icon beside the event total and you wish to pay less than the full amount, select it. The amount to be paid will change to a text box allowing you to edit this amount. The system may suggest a recommended amount and it will enforce a minimum payment. Press [Tab] to move off the field and post your change; the total selected for payment will be updated.
Some events in the calendar are defined as QuickEvents. They have fewer options, no fees, and you can register for them on one screen in just a few seconds (sometimes even with just one click!) Two screens if you’re adding guests.
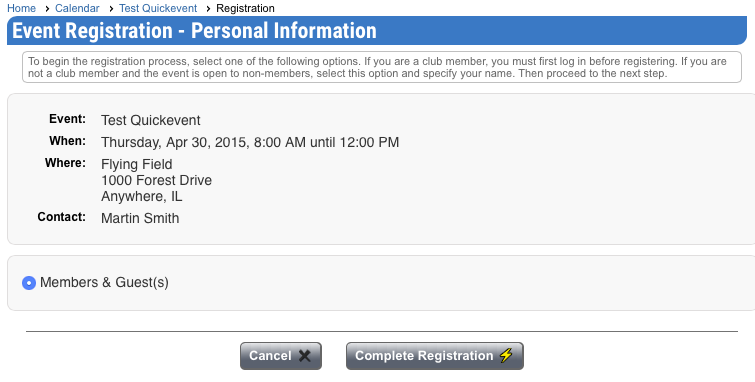
If the QuickEvent does not allow guests, just select Complete Registration, and you’re done!
If the QuickEvent allows guests, the wizard will have a second screen. Select the Next button to see the Add Guests screen. You can quickly add guests or people who are part of your membership (such as family members.)
If you’re not a member, you will be asked to enter basic contact information on the first screen.
When you click Complete Registration, you are registered! There are no fees for QuickEvents, no additional questions to be answered, and no release/waiver agreement to be signed.
Where cancellation of registration is allowed, you may cancel from either the Member Profile screen, or from the event itself.
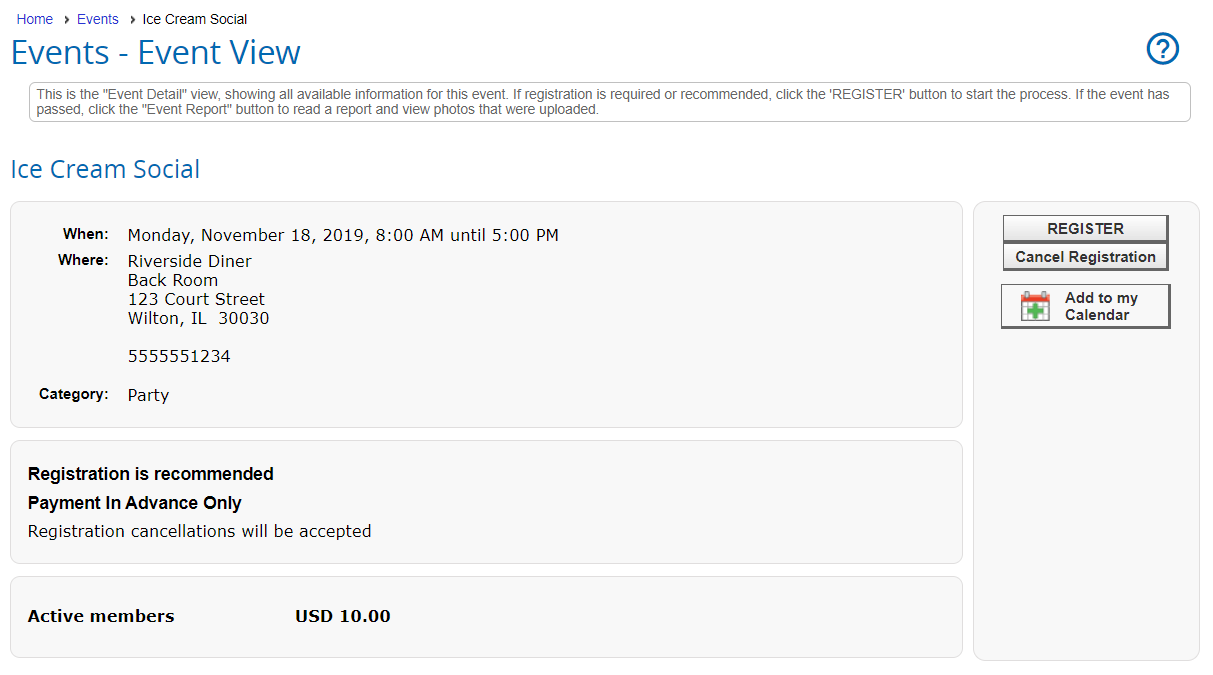
To cancel registration from the event, view the Event Details and click the Cancel Registration button. You will receive an email confirming your cancellation request, and a refund (if applicable) for the event.