Part 3. Formatted Description and/or Rules
The Formatted Description screen is where you will configure the formatted description for your event using the Content Editor.
The Formatted Description screen has two (2) sections:
- Content Editor - Use the Content Editor to add a description with formatted text, photos and links.
- Event Rules - Add text for special event rules to display with the description.
Event Creation Wizard Pages
If you select a page to add information to, but decide later you don't need the page you can remove it from the wizard by selecting the Remove From Event button that appears at the bottom of each page in the wizard.
Adding a Formatted Description
Use the Content Editor to add a formatted description to your event. In this example, we'll add a photo, description of event activities and rules for the event. For more information on working with the Content Editor, go here.
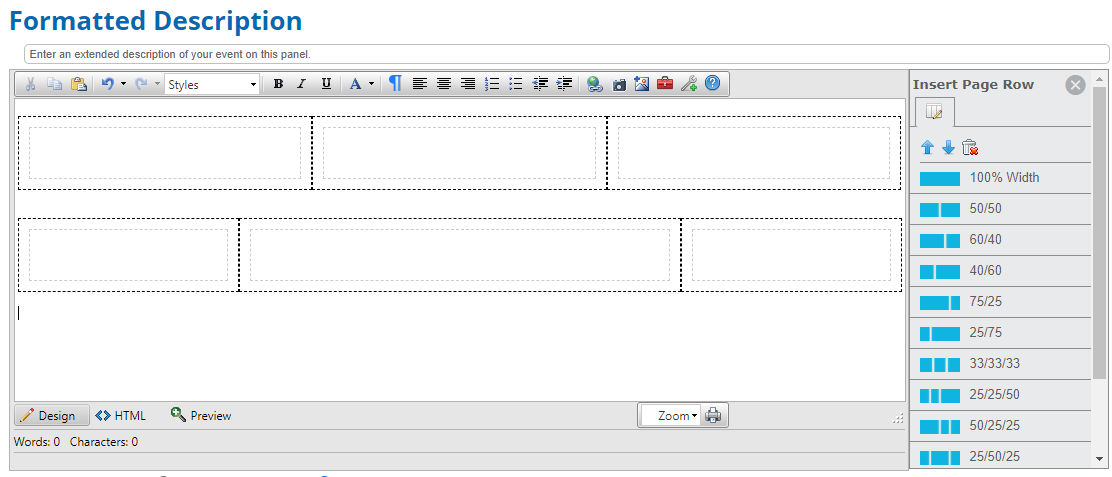
Step 1. Build the Outline
Page Rows ensure the description displays properly on all screen sizes and contain cells which will hold all the formatted description content.
Place the cursor in the editing area of the Content Editor, then select the desired Page Row option from the Insert Page Row panel. In this example, we inserted a 33/33/33 option followed by a 25/50/25 option.
Making Changes to Page Rows
If you want to change the order of the Page Rows you selected or delete a row, select the row and use the
 icons to move the row up or down, or delete the row.
Step 2. Add Content to Page Row Cells
Use the tools in the Content Editor to add formatted text, photos, links and more to the formatted description. In this example, we will add an image and formatted text.
Using the Content Editor Tools
Remember to click the wrench icon in the Advanced Content Editor to display the full toolbar. Once you're done adding Page Rows, or if you want to remove the Page Row menu from your view, you can close the menu. To see the Page Row menu again, click the red briefcase.
Using the Content Editor and Page Rows
Page Rows ensure the content you place in the Content Editor displays properly on any screen or device, even mobile devices. Avoid typing or adding photos directly into the Content Editor and only add content to Page Rows.
- Adding an Image
Select the cell for the image. The selected row will have a blue border, and the selected cell will have a solid black border.
- Select the Photos icon browse images saved to Photos, or the Images icon to browse images saved to Web Graphics, or to upload a new image.
- Adding Text
Select the cell for the text. Begin typing in the cell, using the text formatting options in the Content Editor.
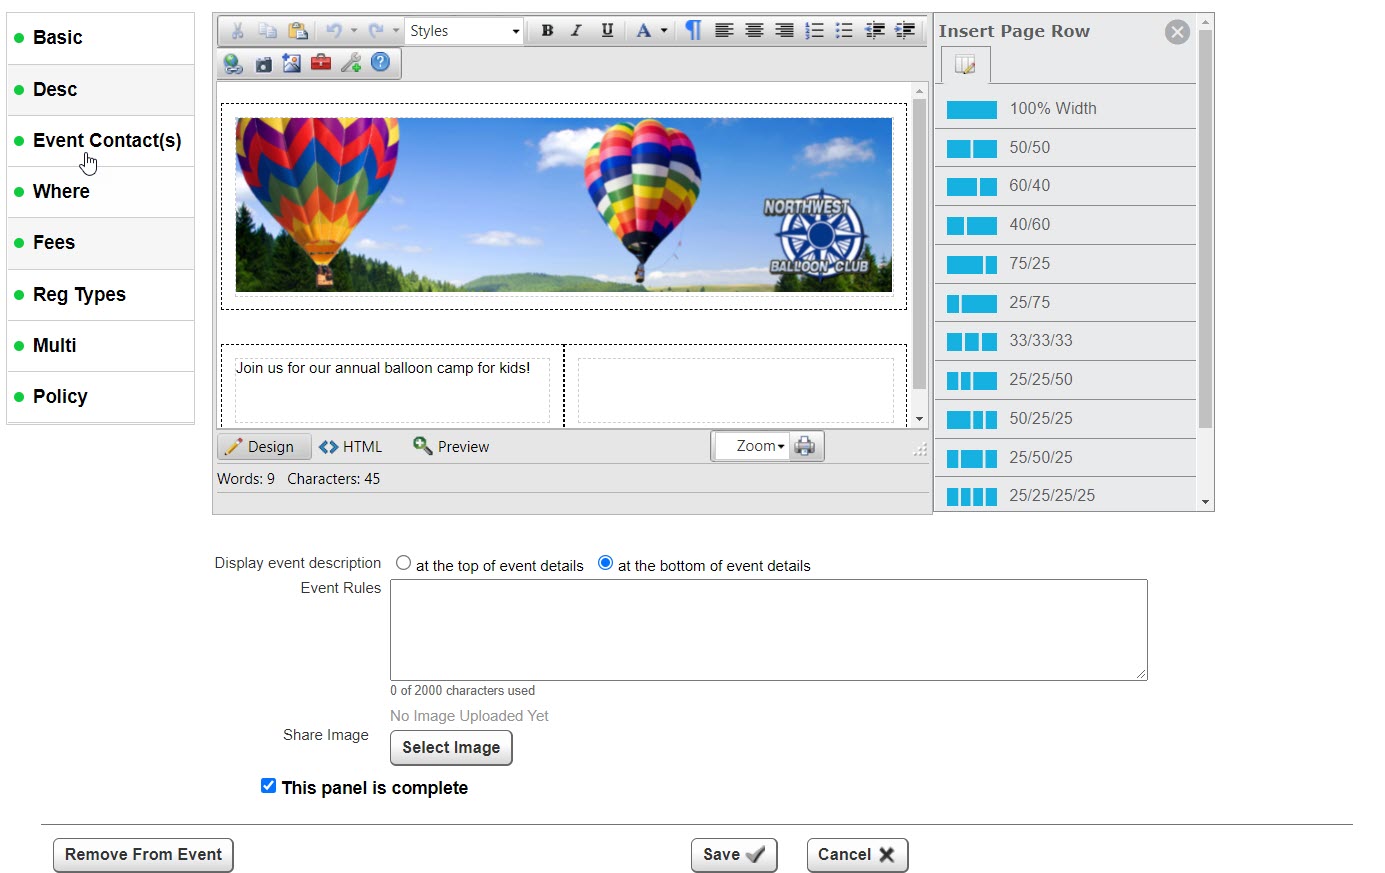
- Display Event Description
Select at the top of event details to show the description before the name, date and location of the event. Select at the bottom of event details to show the description after the name, date and location of the event.


Step 3. (Optional) Add Event Rules
Enter the rules for the event or venue . These rules will display on the event page above the event description.

Step 4. Select This panel is complete, then Save to save your changes and return to the Event Admin screen.
Step 5. Navigate to Event Coordinator(s)
Select the Event Contact option on the Builder Status Menu, then select the Edit icon in the panel.