Part 5. Location
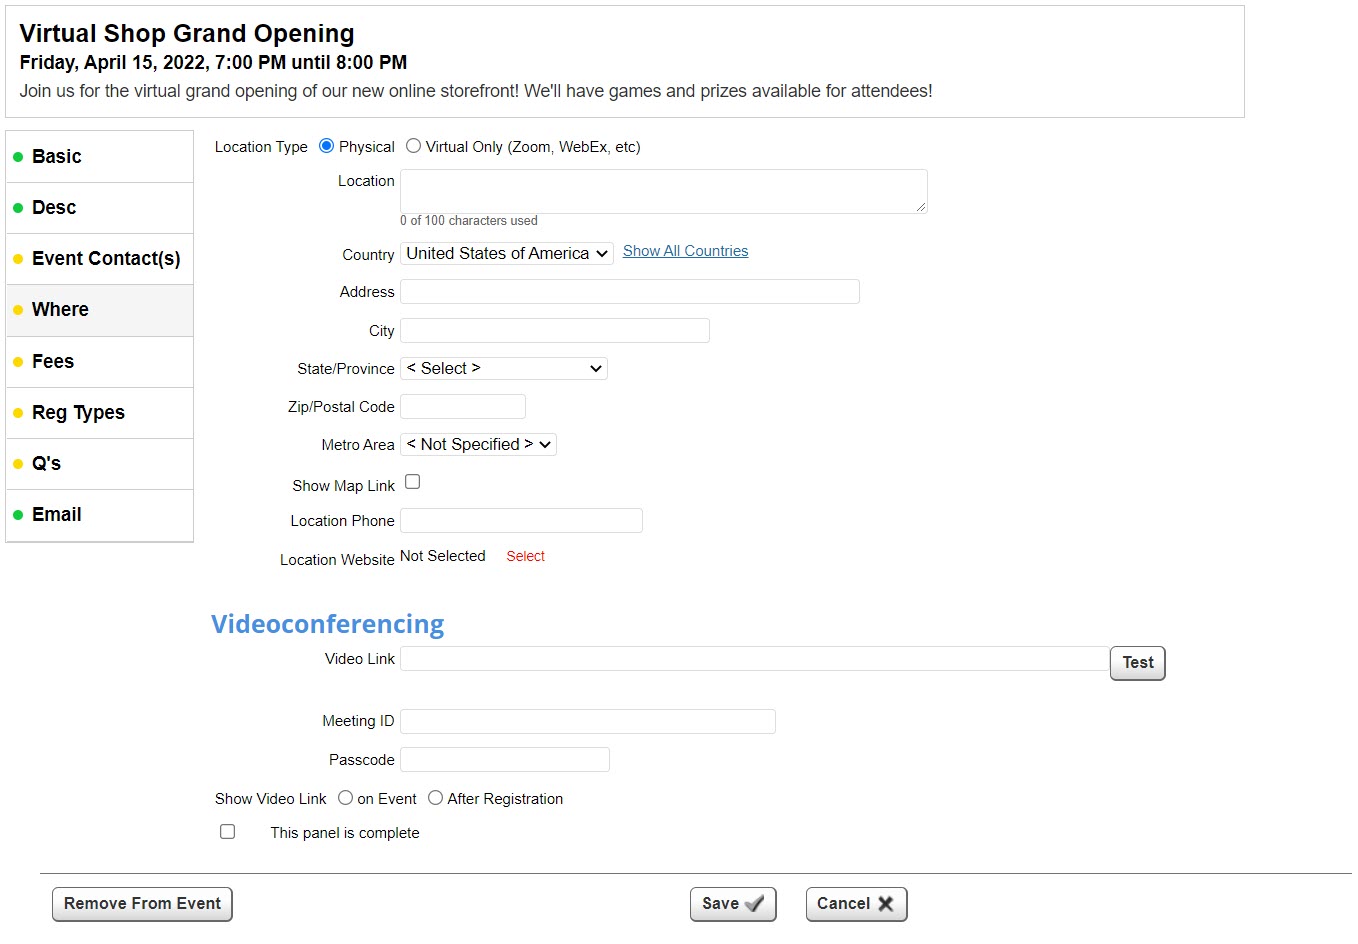
The Location screen is where you will enter the location information to display on the event page.
Default Event Locations
If you find that you tend to choose the same locations most of the time, you can create a list of frequently used locations in Configure > Locations. The list of locations will appear in a drop-down menu on the Location screen of the wizard. You can still enter a new location in individual events.
Add an Event Location
Step 1. Location
Choose whether the location is physical or virtual. If the location is physical or a combination of physical and virtual ("hybrid" events), follow Steps 2 - 5. If the location is virtual only, skip ahead to Step 5.

Step 2. Name and Address
Enter the name of the location. Enter the address and phone number of the event location.

Step 3. Additional Location Information
- Select Show Map Link to show a link to the map in Google Maps.
- Select the Select link in Location Website to add a website for the location.
- Select the Select link to view the Build a Link pop-up dialog.

- Link Type and Address
- Custom Page - Link to any custom pages you have created. The next field is a drop-down list of custom pages.
- Photo Album - Link to a photo album, if Photo Albums is enabled. The next field is a drop-down list of categories; once you select a category, you can select a photo album within that category.
- Document –Link to a document stored in your documents module, if the Document Library is enabled. The next field is a drop-down list of categories; once you select a category, you can select a document within that category.
- External Page – This is a link to a web page stored on another website. The next field will prompt for the External URL, the address of the website you wish to go to.
- Email – The next field will prompt for the Email Address.
- Blog - Link to any blog, if the Blogs module is enabled. The next field is a drop-down list of available blogs.
- Volunteering Opportunity - Link to any volunteering opportunity, if the Volunteering module is enabled. The next field is a drop-down list of available opportunities.
- Add to Mailing List link - Enter a link the allows non-members to add themselves to your organization's mailing list. These non-member contact are also automatically added to your non-member database.
- Link Properties
- Link Display Type - Links can be represented in three ways, using text, a button or an image. If you select Text or Button, the next field prompts for the text to be used. If you select Image, the field is replaced by a button that displays the Image Selector pop-up window, where you can browse your Web Graphics library for images, or upload a new image.
- Target Window - Select Same Window to open the link in the same window as the event. Select New Window to open the link in a new window or tab.
- Select Save to save your changes and return to the Location screen.


Step 4. Select This panel is complete and Save to save your changes and return to the Event Admin screen.
Step 5. Virtual Location
If your event will not have a virtual component, skip ahead to Step 6.
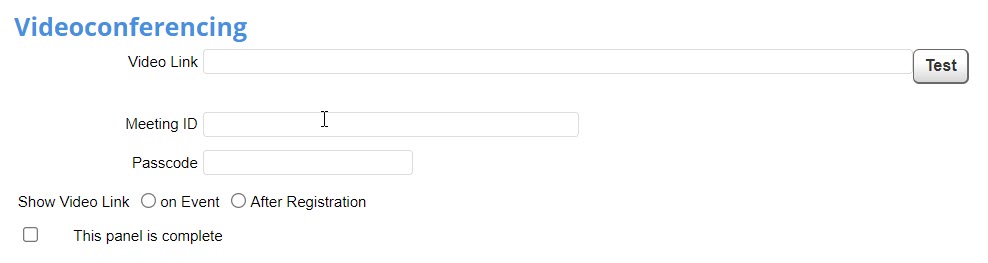
Enter the link used for your virtual event. If there is a meeting ID or passcode, enter those in the appropriate fields. Finally, determine when the link should be sent: on the day of the event, or after the user has registered.
Step 6. Navigate to Registration & Fees
Select the Registration and Fees option on the Builder Status Menu, then select the Edit icon in the panel.