Waitlist
If either Recommended, Required, Required by Date is selected in Part 6, Step 1a and a registrant capacity is set in Part 6, Step 2a, you have the option to enable a Waitlist for the event. When event registration reaches capacity and a Waitlist is enabled, registrants can add themselves to the Waitlist and receive a notification when a spot opens up for registration. Waitlist settings are configured on the Registration & Fees screen.
Configuring the Waitlist
Step 1. Configure the Waitlist settings
- Create Waitlist - Select Yes to enable the Waitlist.
- Maximum count - Enter the maximum number of people permitted to add themselves to the Waitlist.
- Waitlist hours - Enter the amount of time a Waitlisted person has to register for the event once they have been notified that a spot is open for registration.


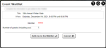
Navigating to the Waitlist
When the Waitlist is enabled, a new icon appears on the Event Admin screen in the Admin Toolbar. Select the Waitlist icon in the Admin Toolbar to navigate to the Waitlist Manager screen.

Adding a Member or Non-member to the Waitlist
Note: When the Waitlist is enabled and event capacity is reached, members and non-members will see the option to add themselves to the Waitlist instead of the option to register for the event. The following instructions are for administrators or event coordinators adding members and non-members to the Waitlist from Waitlist Manager screen.
Step 2. (Optional) Add a Member to the Waitlist

- Select Add Member to add a member to the Waitlist.
- In the Event Waitlist popup, select Select to search the member database.
- Number of guests (including you) - Enter the number of people to add to the Waitlist, including the member.
- Select Add me to the Waitlist to add the member (and guest(s)) to the Waitlist.

Step 3. (Optional) Add a Non-member to the Waitlist

- Select Add Non-member to add a member to the Waitlist.
- (Optional) In the Event Waitlist popup, select Search Non-Member Database to find the non-member if they are already in the non-member database.
- Enter the contact information for the non-member. The non-member will be added to the non-member database.
- Number of guests (including you) - Enter the number of people to add to the Waitlist, including the non-member.
- Select Add me to the Waitlist to add the non-member (and guest(s)) to the Waitlist.


Managing the Waitlist
If an existing registrant cancels their registration, two additional buttons appear in the Waitlist Manager: Notify All Waitlist Users and Notify Next Waitlist User.
Step 4. Notifying Waitlist Users
Select the appropriate option to notify one or more of the users on the Waitlist:
- Notify All Waitlist Users - Send an email notifying each person that one or more spots for registration have opened.
- Notify Next Waitlist User - Send an email to the person at the top of the Waitlist queue.
- Notify User icon (in the Maintain column) - Send an email to notify that user.

Waitlist Hours
The time a waitlisted user has to register for a newly opened spot is the number of hours you entered in Step 1c. If the number of hours has passed and a waitlisted user has not registered, the status of waitlisted users will change to Time Expired. An administrator or event coordinator can use one of the options in Step 4 to notify waitlisted users again.
Step 5. Deleting Waitlist Users
Select the appropriate option to remove one or more users from the Waitlist.
- Delete Waitlist - Permanently delete all users from the Waitlist and optionally send a notification to the users.
Deleting the Waitlist
This option permanently removes all waitlisted users from the Waitlist; use this option with caution.
- Remove All Waitlist Entries - Remove all users from Waitlist and optionally send a notification to the users. The status of the waitlisted user will change to Removed by Admin.
- Delete icon (in the Maintain column) - Delete an individual user and optionally send a notification to the users. The status of the waitlisted user will change to Removed by Admin.
Deleting a User Removed by Admin
If a user has been deleted or removed, with a status of Removed by Admin, selecting the Delete icon again will permanently remove the user from the Waitlist.
Reactivating a Waitlisted User
If you select Remove All Waitlist Entries or use the Delete icon to remove an individual user from the Waitlist, an administrator or event coordinator can select the Reactivate icon
 to add the user back to the Waitlist.